Owning a historic home is like preserving a little piece of history. Across America, many gorgeous historic homes have stood the test of time, showcasing remarkable craftsmanship and unique designs. However, their enduring charm often comes with challenges, including high upkeep costs. One common issue? Inefficient, aging windows.
Older windows, while full of character, are notorious for drafts and poor insulation. If your home still has its original windows, you’ve likely experienced the frustration of escalating energy bills due to heat loss in the winter or excess heat gain in the summer. Replacing those old windows with modern, energy-efficient replacement windows can help you save on energy costs, add comfort, and even increase your home’s value.
Before you can install replacement windows, you’ll need to measure your windows correctly to ensure a proper fit. Don’t worry; we’ve got you covered! This guide will walk you through everything you need to know, step by step, to accurately measure for replacement windows in older homes. Grab your measuring tape, and let’s get started!
The Benefits of Replacing vs. Restoring Old Windows
Before we jump into the measuring process, it’s worth exploring whether replacing your windows is the best route for you. Owners of historic homes often wrestle with this decision. Should you replace your windows entirely or restore the originals?
Restoration involves keeping the historic windows but making upgrades like adding weatherstripping, repairing broken sashes, or replacing single panes with custom glass. While appealing to purists, restoration has its limitations. Even restored, old windows can’t match the energy efficiency of modern replacement windows. Restored windows often lack thermal insulation, leading to drafts and less effective temperature control.
On the other hand, opting for replacement windows doesn’t mean losing the historical charm of your home. Many manufacturers specialize in producing wood-clad or historically styled replacement windows. For instance, you can retain the aesthetic of old wood windows while enjoying double or triple-pane glass for better insulation. Certain models even feature UV-blocking coatings to protect your furniture and further reduce energy costs.
The benefit of choosing replacement windows is that it allows you to marry historical aesthetics with energy-efficient technology, creating a win-win situation that maintains your home’s character while modernizing it for comfort and savings.

How to Measure for Replacement Windows
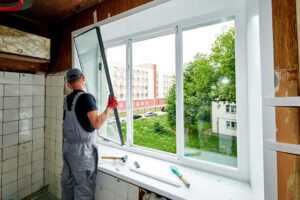
Getting the dimensions of your windows right is critical when ordering replacement windows. A poorly fitted window can result in energy inefficiency, difficulties during installation, or even the need for costly reorders. By taking accurate measurements, you ensure a smoother, quicker installation process. Here’s how to measure properly:
Step 1: Decide on Materials
Before picking up your tape measure, consider the type of material you want for your replacement windows. The material can affect the window’s appearance, efficiency, and maintenance requirements.
- Wood: Homeowners of historic properties often lean toward wood frames for their authenticity. Wood offers a timeless appeal and can match the existing architecture of older homes. However, wood requires more maintenance to prevent rot, warping, and weather damage.
- Vinyl: Vinyl windows are a low-maintenance, budget-friendly alternative. They provide excellent insulation and are available in various styles and finishes.
- Aluminum: If durability is a priority, aluminum offers sturdy protection, but it isn’t the best insulator.
- Wood-Clad: A hybrid option, wood-clad windows combine the aesthetic of wood with the durability of an exterior material like vinyl or aluminum.
Choosing the right material will ensure your replacement windows meet your needs and aesthetic preferences.
Step 2: Determine Full-Frame vs. Insert Replacement
Next, decide whether you need a full-frame replacement or an insert replacement.
- Full-Frame Replacement: This involves removing the entire window, including the frame and trim, down to the studs. This option is ideal when your existing frames are damaged, warped, or rotting.
- Insert Replacement: If your existing window frame is in good shape, you can opt for an insert window, which fits into the existing opening. This method is less invasive and often quicker to install.
Knowing which replacement type you need will help you measure accurately and order the correct windows.
Step 3: Measure the Width
To measure the width of your replacement windows, follow these steps:
- Open the window and measure the width between the jambs (the inside edges where the window sash slides). Measure at three points:
- Top
- Middle
- Bottom
- Write down all three measurements.
- Use the smallest measurement to ensure the new window fits snugly.
Measuring at multiple points ensures accuracy, as older homes can settle over time, causing slight shifts in the window frame.
Step 4: Measure the Height
Next, measure the height of the opening:
- Measure from the inside of the top jamb down to the window sill at three points:
- Left
- Center
- Right
- Record all three measurements.
- Use the smallest measurement when ordering your replacement windows.
This step helps account for irregularities or uneven settling.
Step 5: Measure the Depth
Finally, measure the window’s depth. This can be tricky, but it’s crucial for proper installation:
- Measure from the interior trim to the exterior blind stop strip.
- Ignore any parting strips or weights, as these will be removed during installation.
- Ensure the depth measurement is at least 3 1/4 inches, which is standard for most modern replacement windows.
If the depth is less than this, consult a window technician to explore possible solutions.
Common Challenges of DIY Window Measurements
Taking your own measurements can seem simple enough, but there are pitfalls to watch out for:
- Irregular Frames: Older homes frequently have frames that are no longer perfectly square. This can complicate measurements, making professional expertise invaluable.
- Human Error: Even a small miscalculation can result in ill-fitting windows, wasted time, and costly replacements.
- Unclear Terminology: If you’re unfamiliar with terms like “jamb” or “sill,” it’s easy to misinterpret measurement instructions.
Incorrect measurements can lead to significant financial and logistical headaches. For this reason, many homeowners choose to bring in a professional window technician to confirm their calculations before making a purchase.
The Value of Professional Help
While DIYing your window measurements can feel satisfying, it’s not always worth the risk. Professional technicians have the tools, know-how, and experience to measure old windows accurately and recommend the best replacement options for your home. They’ll ensure your windows fit like a glove, and they can also assist with installation.
A certified window technician can spot potential issues, like structural problems or frame rot, that might not be obvious to an untrained eye. This added peace of mind can save you from headaches and unexpected expenses down the line.
Are You Ready to Install Replacement Windows?
Whether you’re tackling drafty windows or aiming to restore comfort and beauty to your home, modern replacement windows are a worthwhile investment. By following this guide, you can measure your windows for a proper replacement, ensuring a stress-free installation process.
Still feeling unsure about taking measurements yourself? Consider reaching out to a qualified window technician. They’ll help you avoid errors, choose the perfect materials, and ensure your replacement windows are installed without a hitch.
If you’re ready to brighten your historic home with replacement windows, we’re here to help. Contact us for an estimate today, and take the first step toward a more comfortable, energy-efficient home. Don’t wait to upgrade your windows and enhance your historic home!