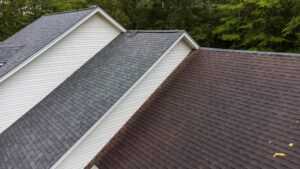
Siding installation is an essential project for every homeowner. After all, siding changes the appearance of your home in many ways. It also protects your home from the elements, especially water damage. Siding protects the exterior walls from rain, wind, and sun damage.
Yet, as a homeowner, there’s a good chance you won’t think about your siding until there’s a problem. When it comes time to replace worn-out or damaged siding, it’s vital to be well-informed about the process. Here are five things you need to know about getting new siding for your home.
1. Remove Your Old Siding
The first step to installing new siding is removing your old siding. Start by getting rid of any debris and vegetation around your house. This will make working on your home easier and safer. You may also want to remove any items stored on your deck or in other areas outside your home, as these items could be damaged during construction.
To remove any portion of your exterior siding, start by removing it in sections. This can be done by simply pulling it off and setting it aside for disposal later on.
A professional siding contractor can do this, or if you’re handy, you can do it yourself. When tackling this project yourself, be careful not to damage any other sections of your house, as some houses already have several layers of siding.
If you have trouble removing the siding from one section of your house, try using a hammer and chisel to pry it off if possible. It is also a good idea to wear protective clothing and eye protection when removing old siding.
For example, gloves can protect your hands, while long sleeves and pants can protect your skin. There may be nails or other sharp objects hidden beneath the surface, so you want to ensure you are protecting yourself.
2. Inspection
Once you have removed all the old siding, it’s time to inspect the underlying structure for damage. Look for any holes or other signs that the structure of your home has been compromised.
You should also check for damage caused by nails or staples left behind by the previous siding installation. If there is significant damage, you may need repairs before proceeding with your vinyl siding installation.
3. Install a Water Resistant Barrier
In the process of installing vinyl siding, you want to ensure you are using a water-resistant barrier. Moisture and temperature changes can mean that you will have gaps between the joints in your siding. This can allow water to seep into your home during rainstorms.
If this happens, preventing water damage inside your home will be impossible. It could also lead to problems with mold growth if the moisture stays inside the walls for too long.
By installing a water-resistant barrier between the outside of your house and the inside, it makes it much easier for you to protect against these types of problems from happening in the future.
Using products such as Tyvek wrap, Cyclone Siding Sealer, or an equivalent product will help protect your home from moisture damage during and after installation.
The goal when installing siding is to create an air-tight seal around your home so that no water can get inside at all! It also helps keep insects and excess heat out during the summer when you need it most!
4. New Siding Installation
Once you have completed the steps above, you’re ready to install the new siding. Installing vinyl siding is not difficult, but there are some things you should know before starting the job.
Vinyl siding comes in panels attached to the house with nails or staples. The first step is to measure the length of each panel and mark the panel location on the house with chalk lines or masking tape. After cutting off any excess material at the bottom of each panel, set the first panel into place along one of your chalk lines.
Begin at the bottom of the wall and work your way up, overlapping each piece as you go. Hammer in nails along one side edge of each panel (this will be covered by trim around windows).
Be sure to use corrosion-resistant nails or screws to seal all joints with caulk or similar sealant. The next step is to snap on flashing tape on top of the nail heads at least 3/4 inches above them (or above where they will be covered by trim).
You may want to set up a straight piece of lumber as a guide for installing each panel. Make sure to hold it against one end while you slide in one end and nail it down on top of flashing tape; then move over slightly and use the same piece of lumber as a guide for the next panel.
5. Customize Your Siding
Once the new siding is installed, you can do a few things to customize it. Change the color. Vinyl siding comes in every color imaginable, so it’s easy to find something that will match your home perfectly.
If you’re looking for something more unusual, try painting or staining your new siding instead of buying colored vinyl panels. If painting, use quality exterior paint and follow all manufacturer’s instructions for application and cure times
You can also add trim to your vinyl siding. To give your house a custom look, you can use trim around windows and doors to match the existing trim on your house. You can also use traditional wood trim or other materials such as metal or stone if you have them in mind for other parts of the exterior of your house.
Ready to Give Your Home a Makeover?
The process of siding installation requires careful consideration and research. However, by being informed about the process and knowing what to expect, you can be sure that you will be satisfied with the results. If you are looking to give your home a makeover with new siding, do it the right way!
Our dedicated team of professionals can handle your vinyl siding installation without a hassle. Contact us today to get started with an estimate.